
Easy Paneer from Scratch
Cheese seems so mysterious, doesn't it? Let's demystify it.
To keep it simple, there are two types of cheese, fresh and aged. Fresh cheese (like paneer, ricotta and mozzarella) does not use bacteria that will change it over time while aged cheese (cheddar, brie and feta) get more flavour, texture and structure as the bacteria is given time to work with things like temperature and moisture to become more complex. Fresh cheese is a simpler place to start and while we enjoy being DIYers, simple is a true blessing.
Making cheese is essentially the practice of separating the milk solids from the milk - or extracting the curds from the whey. We do this through the type of milk that we use, different acidifiers that cause the separation and thoroughly stirring the concoction to distribute our acidifier evenly.
First, milk type:
To make cheese, you must use milk that hasn't been homogenized. Homogenization is the process by which milk is forced through thin tubes at high speeds which emulsifies the milk so that it does not separate into layers in the milk carton. Homogenization makes it so that you don't have to shake your milk before you pour it. In cheese making, we want the milk solids to separate from the milk so we need to use non-homogenized milk.
Many people confuse whole milk with homogenized milk. These are two totally different things. Whole milk has about 3.5% milk fat (as opposed to 2% or skim milk) and can be homogenized or not. Homogenized refers to whether the milk will separate or not, not to the amount of fat in the milk. Now, don't confuse any of this with pasteurization. Pasteurization is the process by which raw milk is heated to destroy both the good and any pathogenic bacteria that may make people sick. Raw vs pasteurized milk is a whole other discussion. For now, only pasteurized milk is available for sale in Canada however, it is possible to buy cheeses that have been made with unpasteurized milk.
In addition to homogenization, in the case of buttermilk or cream, the practice is to add gums and thickeners to it so that it will not separate (really industry, we can shake the carton…not that hard). When using buttermilk as the acidifier for your cheese (or cream as the base of a cheese) you will need to make sure that it is just pure, nothing added. Vital Green Farms, a local Alberta farm, supplies Amaranth with beautiful buttermilk and heavy cream without any unnecessary ingredients.

Cheese can be made with skim, 2%, whole milk or even cream. We are going to use whole milk to give a nice creaminess and also a larger yield. If cheese is made from separating the solids out of the milk, the fattier your milk, the more cheese you will get out of it. A lower fat milk has less solids in it and if we are talking whole foods, whole milk is just how nature delivered it.
Visit your local Amaranth store for a selection of organic milk options. Choose one labelled non-homogenized. Organic milk may still be homogenized, so it must state that it is not in order for you to be sure.
A note on organic milk: It is true that the rules around dairy farming and hormones and antibiotics are different in Canada. Much of the negative press around non-organic dairy is American information. If organic is important to you know that organic milk is from animals that have been fed only certified organic feed which also means no gmo's and an organic approach to land and water use.
Acidifiers:
Yay, science! In order to get the solids to separate from the milk, there has to be a reaction that happens. This is a combination of heat, the molecular structure of milk and the addition of acid. Common acidifiers that can be added to make this reaction happen are things like lemon juice, vinegar, citric acid or buttermilk.
Stirring technique 101:
When you get your milk to the correct temperature and you are ready to add your acid, you want to evenly distribute it throughout your milk. To do this, you are going to use your wisk in a vigorous up and down motion. Imagine that you are playing charades and you must do your most dramatic rendition of a train. Not the whistle, but the wheels going around and around. That is the motion you are going to do with your whisk when you stir. You want to bring the milk from the bottom of the pot to the top and cycle it around to the back. Got it?
Now, before we get down to centuries of milk preservation tradition, there are just a few more details. Make sure that your work space is very clean and well sanitized. True, we are working with fresh cheese so bacterial play is not so important, but surely you will love doing this so much that you will want to move on to trying some aged cheeses. It is good practice to learn to keep your utensils and hands free of any contamination that may interfere with your cheese. Your paneer is going to sit on the counter for a while when it is weighted down, so keeping it free of unwelcome bacteria is wise here too. If you move into aged cheeses, you can also keep the good bacteria that will age your cheese happy by using chlorine free water and a sea salt rather than a table salt or rock salt. Sea salt is iodine free and iodine is great at eliminating bacteria, even the good kinds.
Tools of the cheese trade can be many. You can get by with a whisk, slotted spoon, sauce pan, measuring cup, and a seive/cheese cloth/bowl combo or a nut milk bag/bowl combo. It would be most helpful to also have a thermometer, string, a cookie sheet and cookie cooling rack. However, you are resourceful. That is why you are willing to make your own cheese. Read through and get crafty using what you have. You can always get some equipment later if you want to expand your cheese making hobby.
Paneer
750 mL of 2-3.5% non-homogenized cow's milk (see below for a goat's milk version)
375 mL buttermilk (no gums or thickeners), brought to room temperature
1/4 tsp fine sea salt
Directions:
Pour the milk into a clean, large stockpot and bring it very slowly to 82C (185F). This should take approximately 20 minutes. If you don't have a thermometer, you want the milk to begin to steam and start to look foamy, but not boil.

Remove from heat and pour in the buttermilk, whisking it in that up and down chugga chugga motion just to combine (about 15 stirs). Coagulation will start immediately, just leave it be with the lid on for about 2-5 minutes.
Place the pot back on the heat and bring it up to 90C (195F), stirring occasionally with a slotted spoon. Remember that you are looking for the curds to come together so stir gently or you will encourage them to all split apart. If you still don't have a thermometer, you wanting to be close to boiling, but still not boiling.
Once you get it up to temperature, keep it there for about 10 minutes, gently stirring on occasion. The curds will begin to form a solid mass.
Remove from heat and cover for 5 more minutes.

Line a strainer or colander with a cheese cloth or stretch a nut milk bag over the top of your bowl. Gently ladle your curds in using your slotted spoon. Tie the corners of your cheese cloth or tie the top of your nut milk bag and hang. Let it drain for about 10 minutes.
Untie and add the salt, gently tossing the curds to incorporate and tie it again and let it drain for another 5-10 minutes.
On a cookie cooling rack to allow for moisture to escape, keeping the curds in the bag, press it into a firm oval or square shape that is about 1 inch thick. You now want to place a weight over top of the cheese to encourage firmness. You could place a cookie sheet over the top and fill your used milk jug with water and place it over the top. Get creative. You want at least 2 pounds of pressure. Let it sit under the weight for 30 minutes or more. The longer you leave it, the firmer and drier it will be.

Store it wrapped in the fridge for up to 5 days. This cheese does not easily melt making it perfect for grilling or stir fries.

Goat's milk version
1 litre non-homogenized whole goat's milk
1/8 cup fresh lemon juice
1/4 tsp fine sea salt
Follow steps 1-2 above except you are adding lemon juice instead of buttermilk. Then let it sit for about 20 minutes. You are not going to put it back on the burner but rather just let it sit. Then follow steps 6-9 to complete! The goat milk paneer will be a bit softer and less dense than the cow's milk version.
Try this great recipe using your homemade paneer!
Til-E-Paneer
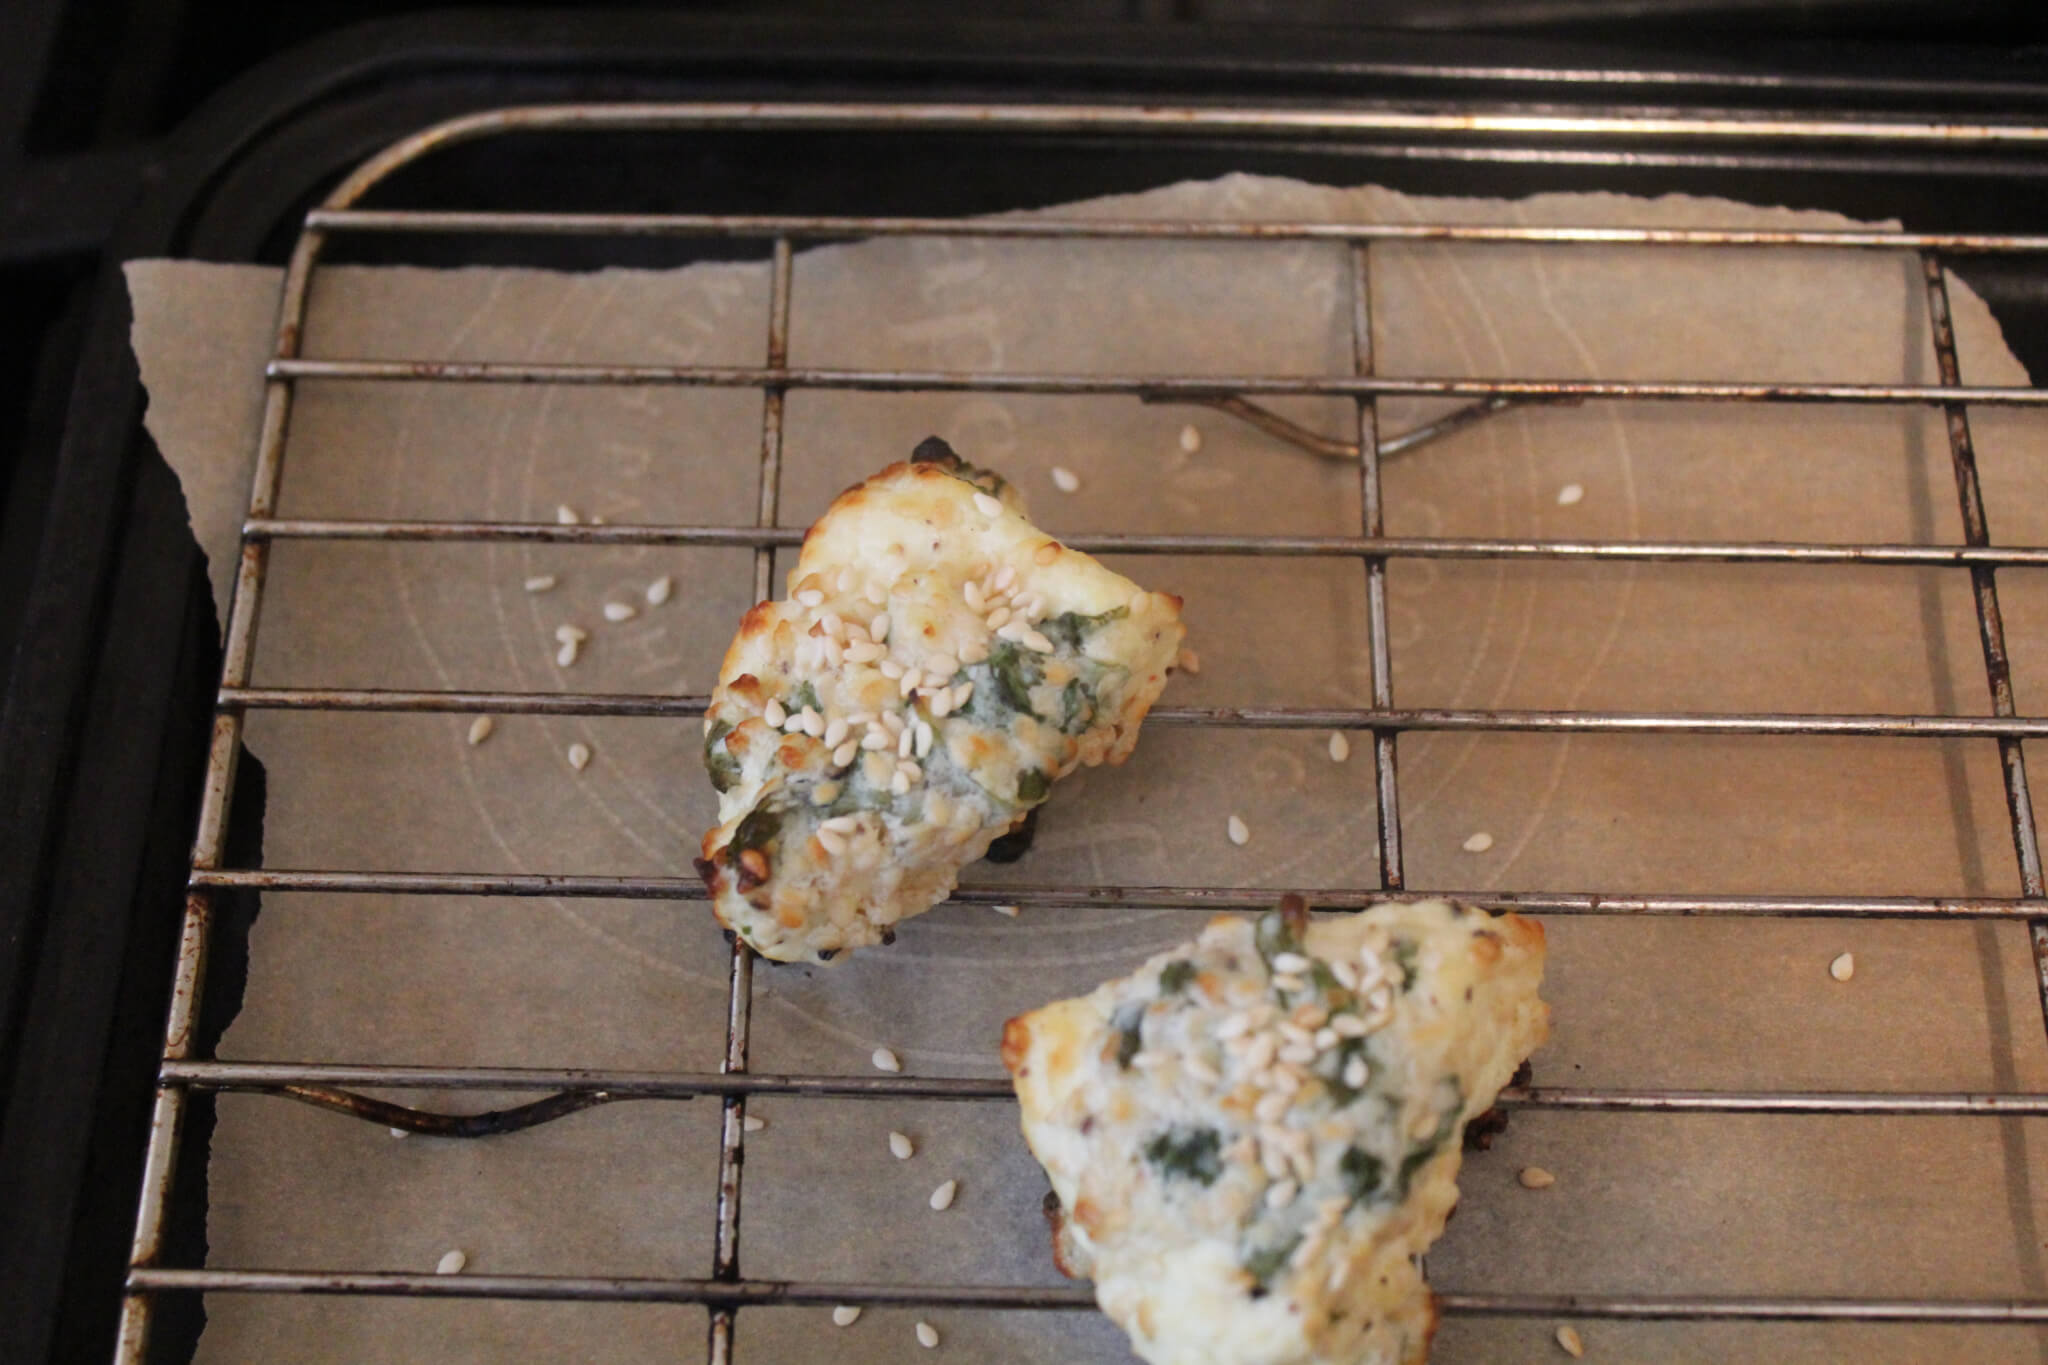
6 inch diameter slab of paneer, cut into about 1 1/2" cubes
1 tsp each of finely grated garlic and ginger
1 tsp finely ground black pepper
1 tsp honey
1/4 tsp salt
1 Tbsp cilantro leaves, chopped, extra for garnish
1 Tbsp plain yogurt
2 Tbsp white sesame seeds, roasted (see instructions below and save a bit for garnish)
1 Tbsp olive oil (the oven is hot but these aren't in there for very long so olive oil should stay healthy)
Lemon or lime wedges, to garnish
Directions:
Preheat oven to 400F.
Place your sesame seeds in a stainless steel or cast iron frying pan (skip the teflon contamination) and turn your burner to high. Let them sit for 2-3 minutes and then give them a mix or expertly shake your pan around like you see them do on the Food Network. Let them toast until just slightly browning, mixing every couple of minutes.

Mix all the ingredients except the citrus and combine it thoroughly with the paneer cubes. Let marinate for 30 minutes (or do this step in the morning and leave it for the day). Place the paneer on a drip pan and bake in the pre-heated oven for about 10 minutes (place parchment or foil on the bottom of the drip pan for easy clean up). For crisp paneer, make sure to use a drip pan or something that can serve as one so that the paneer doesn't sit in it's juices. Serve with a simple side salad with the addition of raw onions to get the traditional combination. Garnish with lemon or lime and more sesame seeds and cilantro if you wish. These are delicious and filling little nuggets that would also pair well with a chutney or a little jam like peach or apricot. Yum!
The cow's milk paneer recipe was generously shared by Calgary's own Cuisine et Chateau Interactive Culinary Centre. Check out this gem of a cooking school in the Kensington area. For information on their cheese making classes or any of their delicious cooking adventures, visit www.cuisineandchateau.com.

Posted by Amy Buckman